Marble Tile Cleaning

Welcome to my Work History archive where you will find detailed examples of the cleaning and renovation of Marble tiles carried out in South Yorkshire

Cleaning and Polishing Marble tiles

Marble is reputed in the international market for its premium quality, toughness and durability. It is often the preferred choice for interior and exterior in both commercial and domestic situations for flooring, wall cladding, paving, facades of buildings, pavements and landscaping.

One of the main issues with polished Marble is the polish starts to wear down with use and eventually becomes dull. Another issue we see is acid etching where strong unsuitable cleaning products used on the stone etch the surface and ruin its appearance. To resolve both these problems the stone needs to be re-polished with diamond encrusted burnishing pads of different grits to hone the stone and bring back that deep shine. If this sounds familiar you should talk to us about our annual maintenance program where we visit you once a year to clean, polish and seal your floor thus keeping it in top condition.

Below you will find detailed examples of work we have carried out in the past, it should give you some idea of what’s involved and what can be achieved with the right techniques and products.


Scratched Marble Floor Polishing Alvanley Helsby

Marble Hallway Floor Polished to a Deep Shine in Alvanley

We received an enquiry from the rural village of Alvanley near Helsby asking if we could remove scratches and etching from a Marble tiled hallway floor. Natural materials like Marble are very hard wearing but can become scratched especially in busy areas like hallways. The good news however is those scratches can be removed and Tile Doctor have developed numerous products and solutions to help with that.

Happy to assist I reassured the owner of the property that the issue could be resolved and organised a date to pop round to survey the floor and conduct a test to work out the best way forward.

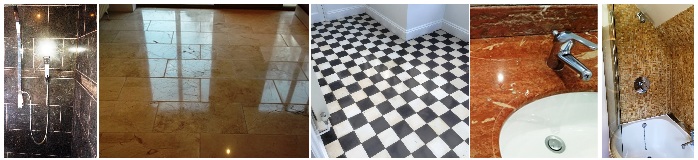
The property was quite large and had a very impressive hallway, the Marble tiles still reflected the light and apart from some light scratches were generally in very good condition.

Scratched Marble Floor Before Polishing Alvanley Helsby

After discussing the floor, I ran a demonstration to burnish a small part of the floor using a set of six-inch Tile Doctor Burnishing Pads. These pads run from coarse to extra fine and work wonders on polished stone removing scratched and making a visible difference to the polished appearance of the Marble.

Happy with the test I was asked to quote for cleaning and burnishing the whole floor to a deep shine and then sealing. I email over a quote later that day which was accepted and a date set for my return.

Removing Scratches and Polishing a Marble Tiled Hallway Floor

Our first job was to wash the floor and grout lines with Tile Doctor Pro-Clean; I find scrubbing the grout by hand with a stiff brush to work in the cleaning solution is the most effective way. Once done the floor was rinsed with water and the soiling extracted with a wet vacuum.

The next step was to start burnishing the Marble using a 17-inch set of four diamond encrusted pads of increasing grits. These pads are run over the floor using a weighted buffing machine to increase traction and contact with the stone. The first two pads as 400 and 800-grit and are used with a little water to remove the scratches, etching and generally clean the stone. After each pad the dirty residue was removed with the wet vacuum and the floor rinsed with water. The process was then repeated using a finer 1500 grit pad which started to put the shine back onto the Marble tiles and after being run over each tile several times the floor was rinsed and extracted again.

Sealing a Marble Tiled Entrance Hall Floor

The floor was left to dry out overnight and work resumed the next morning to polish the floor using the last of the four burnishing pads which is a very fine 3500-grit. This last pad is applied dry with just a spray of water to create a high gloss finish.

Next step was to seal the Marble to protect it from ingrained dirt and staining. This was done using Tile Doctor Ultra-Seal which is a clear impregnator that works by soaking into the stone occupying the pores and ensuring dirt remains on the surface.

To give the floor the deeper shine the owner wanted a final product called Tile Doctor Shine Powder was applied. A tablespoon of shine powder is dissolved into a little water to make a paste and this is then worked into the Marble using a white buffing pad.

Scratched Marble Floor After Polishing Alvanley Helsby

After another rinse and extraction with the wet vacuum the last step was to further buff the floor with a white pad to bring up the deep shine. The finish was very impressive and the owner was very pleased with the improvement int the floor. For aftercare I recommended they use Stone Soap as its designed for the regular cleaning of sealed and polished stone, as well as cleaning it also helps build the patina.


Professional Restoration of a Mable Tiled Hallway in West Cheshire

Marble Hallway Floor Polished to a Deep Shine in Alvanley Read More »

Marble Tiled Hallway Floor Renovation Grade II Listed Building Tattenhall

Marble Entrance Hall Floor Polished in Tattenhall Listed Building

This Black and White Marble tiled hallway floor at a Grade II listed property in the village of Tattenhall has quite a history. The building was constructed in 1865 and at one time it has been the home to the high sheriff of Cheshire, and the family home of Edith Wignall the daughter of Sir Henry Tate the founder of the sugar company Tate and Lyle.

In more recent years the property had been used as a council building and even a nursing home for the elderly. After a long history of decline it has now been restored to a lavish family mansion however the marble floor had suffered over the years and still need attention. The current owner had been in touch as they wanted it restoring and basically brought back to life.

Marble Tiled Floor Before Renovation Grade II Listed Building Tattenhall

As it turns out I had already planned to go to Tattenhall the following week to work on another listed building which was formerly the village bank. After discussing the Marble floor over the phone, I agreed a date and time to pop over from the bank and inspect the floor in detail. I can provide a rough quote from photographs, which has been especially useful recently, but it’s far better for all concerned if I’m able to properly survey the floor first.

The Marble floor consisted of Black and White Mable tiles laid in a diamond pattern, it wasn’t a very large area perhaps 9 square metres in total. The tiles were well worn as described but also stained and scratched. I would see they would need a deep burnish and polish to bring them back to life and then protected with a fresh sealer. Following on from that visit I was able to provide an accurate quote which was accepted, and a date agreed for my return.

Marble Tiled Floor Before Renovation Grade II Listed Building Tattenhall

Removing Scratches and Stains from a Marble Tiled Entrance Hall Floor

The first job was to protect the surrounding heavy wooden panelling with masking film. The floor was very heavily stained yellow with deep scratches, to remove these I would have to grind the marble back until a clean fresh tile was left. To start I used a 200-grit coarse pad fitted to a weighted buffing machine, the abrasive action of the pad was lubricated with water. After inspection I found that the staining and scratches were still there, so I needed to use stronger pads, so I worked my way through a set of very coarse milling pads starting at a 50, 100 and finishing with a 200-grit pad. Again, water was used to lubricate, and the resultant slurry was removed by a powerful wet vacuum and washed down between each pad.
The milling pads had the desired effect, and I was then able to bring back the polished appearance of the Marble surface using a set of finer burnishing pads with the same process. The 400 and 800-grit pads helped to clean and remove the fine scratches left by the milling pads and then the next 1500-grit pad started to build the shine back on the marble tile.

After finishing with 1500-grit pad I washed the Marble with Tile Doctor Stone Soap and vacuumed up the residue with the wet vacuum. I left an industrial blower in place overnight to dry out the floor ready for the next morning when it would be sealed.

Sealing a Marble Tiled Entrance Hall Floor

The next morning, I used the last of the four burnishing pads which is a very fine 3000-grit to polish the floor further. This last pad is applied dry with just a spray of water to create a high gloss finish.

When I was happy, I sealed the floor with two coats of Tile Doctor Colour Grow which is an impregnating sealer that soaks into the fine pores of the Marble to protect it from within. This product also improves colour and after application it was left to soak into the tile for five minutes before polishing off and then leaving it to dry.

Marble Tiled Floor After Renovation Grade II Listed Building Tattenhall

The last step was to I buff the floor with a white pad. The finish was impressive, and the family were very happy with the work we had carried out. For aftercare I recommended they use Stone Soap as its designed for the regular cleaning of sealed and polished stone, as well as cleaning it also helps build the patina.


Professional Restoration of a Mable Tiled Hallway in West Cheshire

Marble Entrance Hall Floor Polished in Tattenhall Listed Building Read More »

Marble Tiled Floor Before and After Polishing Willington

Polishing Marble Floor Tiles in Willington

Although expensive Marble is a highly coveted, popular and classic flooring choice, not only is it hard wearing you can attain a high polish that simply looks fantastic. At peak condition, it’s one of the most beautiful and eye-catching types of stone available, however it’s appearance will degrade over time and with use, so it does need maintaining.

This customer, who lives in the small village of Willington in Cheshire had contacted us because they were concerned that the lustre on their Marble tiled floor which had been installed throughout much of the ground floor had faded and lost its attractive appearance. We arranged a date to go over and re-polish the floor back to health.

Marble Tiled Floor Before Cleaned and Polished Willington Cheshire

Burnishing and Cleaning a Marble Tiled Floor

On arrival the first step was to give the floor a general clean using a mild dilution of Tile Doctor Pro-Clean which is an alkaline tile cleaning product that is safe to use on Marble. I mention this because there are many cleaning products on the market today which are acidic and really only meant for use on Vinyl and Ceramic tiles. The cleaning solution was applied by sponge mop and left to soak for ten to twenty minutes with a particular focus on the grout lines. I used a stiff brush along the grout lines to get them really clean and then once done the floor was then rinsed with clean water and the now soiled cleaning solution removed with a wet vacuum. This process also has the added advantage of removing any grit from the floor which might cause scratching during the next stage which was to polish the floor.

The next step was to use a set of Tile Doctor burnishing pads to polish the stone back to a deep shine. The pads which are encrusted with industrial diamonds are applied with a rotary floor buffer in sequence from coarse to extra fine. The first pad has a Coarse 400 grit which is applied with only water for lubrication, removes minor scratches, sealers, and the top surface dirt. Working in small areas, I applied the pad across the Marble, rinsing in between and picking up the soiled solution with a wet-vac machine. I then repeated this same procedure with the Medium 800 grit pad which is the first stage polishing pad again rinsing with water after use. The next two pads are a Fine 1500 grit and Extra Fine 3,00 grit which really build up a high-quality polish on the stone.

Sealing a Marble Tiled Floor

The floor was left to dry off fully overnight and I returned the next day to seal the Marble first checking with a damp meter that the stone was dry. To seal the Marble tiles I applied two coasts of Tile Doctor Colour Grow which is an impregnating sealer that works by occupying the pores in the stone thus preventing dirt from becoming ingrained. Colour Grow also has the added advantage of enchasing the natural colours in the stone and in this case brought out the deep brown colours in the Marble.
Once the sealer had dried the floor was treated to a gentle buff with a white pad to bring up the shine even further.

Marble Tiled Floor After Cleaned and Polished Willington Cheshire Marble Tiled Floor After Cleaned and Polished Willington Cheshire


Professional Marble Tiled Floor Polishing in Willington

Polishing Marble Floor Tiles in Willington Read More »

=================================

West Cheshire Tile Doctor

================================= Read More »

Scroll to Top