Grout Cleaning

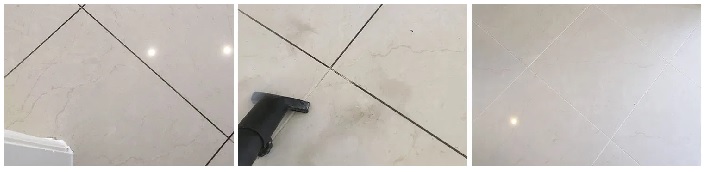
Welcome to my Work History archive where you will find detailed examples of the cleaning and renovation of Grout carried out in West Cheshire

Cleaning and Renovating Grout

The top layer of grout is porous and can absorb grease, dirt and limescale. Spillages such as wine, lemonades or greasy substances will cause marks and patches in the joints in the floor. Grout between wall-tiles particularly in damp areas like bathrooms will become dirty and unattractive as a result of Mould, Mildew and Limescale.

Mould is one of the most unsightly problems, which usually starts off in the wettest area of the room, this could be the bottom of the shower or bath, then starts to spread and if left unchecked could cover a large area of the wall.

Another common issue we find is a problem known as Grout Haze or Grout Smearing where a thin layer of grout has been left to set on the surface of the tile. Once grout has set it is difficult to remove.

Discolouration of grout joints in bath or shower areas due to continued use of acid formulated shampoos and soaps. This causes yellow orange and pink stains to the grout over even a short period of time. Whilst Grout Joints can be cleaned, badly stained grout may need to be re-coloured.

Protecting your grout in advance with a sealer will prevent most of these issues and although relatively unknown in the UK, protection awareness is growing. Sealing forms an invisible barrier between the grout and the surface, this will then protect your investment for years to come.

We have solutions for all the problems listed above and below you will find detailed examples of work we have carried out in the past to resolve many of these issues. It should give you some idea of what’s involved and what can be achieved with the right techniques and products.


Red Black Quarry Tiled WC Floor Renovation

Red & Black Quarry Tiled Floor Refurbished in Chester

We were contacted by a client from Chester who had a traditional Red and Black Quarry tiled floor in need of attention. They had bought the old property to refurbish and wanted to keep as many of the original features as possible. Realising the floor was most likely original they asked if we could clean and seal the two areas of quarry tiled flooring and so I popped over to survey the floor and work out a quote.

Red Black Quarry Tiled WC Floor Before Renovation Red Black Quarry Tiled WC Floor Before Renovation

Although the floor was dirty it was intact and in good physical shape for its age and except for some areas of failed grouting no major repair work would be required. I calculated it would take two days to refurbish the floor, one to clean and one to seal. I worked out a detailed quotation that included the products needed and emailed it over to the client who confirmed they would like to go ahead.

Cleaning/Repairing a Red and Black Tiled Ground Floor

Sealers wear at different rates depending on how busy that part of the floor is, so it’s necessary to strip the whole floor of remaining sealer, otherwise you end up with different layers of sealer and an inconsistent appearance. To do this Tile Doctor Remove and Go which is an alkaline stripper was mixed 50/50 with Tile Doctor Pro-Clean an effective tile and grout cleaner and alkaline.

The combined solution was mopped onto the floor and left to dwell for twenty minutes which gives it time to soak into the pores of the quarry tile and breakdown the old sealer and dirt. The solution was then scrubbed into the floor using a black pad fitted to a Rotary floor machine with added water to help lubricate the process. This combination effectively stripped the floor of old sealer and pulled out the dirt into the solution where it was extracted with a wet vacuum.

Next, the floor was given an acid wash using Tile Doctor Grout Clean-up which further cleans the tiles and dissolves alkaline salts (efflorescence) which can be an issue with old, tiled floors like this one. The acidic nature of this product also neutralises the pH level of the floor following the use of alkaline cleaners earlier.

The floor was then speed dried with fans so we could repair the grout across the whole floor which was in a bad state. The grout was given thirty minutes to dry before the excess was washed off using a wash boy and left to dry out overnight.

Sealing a Quarry Tiled Ground Floor

The next morning damp readings were taken across different parts of the floor to verify it was ready to seal. The readings were fine, so the whole floor was initialled sealed with one coat of Tile Doctor Colour Grow. This is a colour enhancing impregnating sealer that soaks into the pores of the tile protecting it from within and improving the natural colours in the process. The floor was given one hour to dry with fans on before following up with another four coats of Tile Doctor Seal and Go to give the floor a nice appealing shine.

Red Black Quarry Tiled WC Floor After Renovation Red Black Quarry Tiled Floor After Renovation

The client was over the moon and booked us in to have their hallway restored once all other trades have completed their work. For aftercare cleaning I advised the use of Tile Doctor Neutral Tile Cleaner, it’s a mild yet effective cleaner that won’t impact the sealer which can be the problem with stronger products.


Professional Restoration of a Quarry Tiled Ground Floor in West Cheshire

Red & Black Quarry Tiled Floor Refurbished in Chester Read More »

Scratched Marble Floor Polishing Alvanley Helsby

Marble Hallway Floor Polished to a Deep Shine in Alvanley

We received an enquiry from the rural village of Alvanley near Helsby asking if we could remove scratches and etching from a Marble tiled hallway floor. Natural materials like Marble are very hard wearing but can become scratched especially in busy areas like hallways. The good news however is those scratches can be removed and Tile Doctor have developed numerous products and solutions to help with that.

Happy to assist I reassured the owner of the property that the issue could be resolved and organised a date to pop round to survey the floor and conduct a test to work out the best way forward.

The property was quite large and had a very impressive hallway, the Marble tiles still reflected the light and apart from some light scratches were generally in very good condition.

Scratched Marble Floor Before Polishing Alvanley Helsby

After discussing the floor, I ran a demonstration to burnish a small part of the floor using a set of six-inch Tile Doctor Burnishing Pads. These pads run from coarse to extra fine and work wonders on polished stone removing scratched and making a visible difference to the polished appearance of the Marble.

Happy with the test I was asked to quote for cleaning and burnishing the whole floor to a deep shine and then sealing. I email over a quote later that day which was accepted and a date set for my return.

Removing Scratches and Polishing a Marble Tiled Hallway Floor

Our first job was to wash the floor and grout lines with Tile Doctor Pro-Clean; I find scrubbing the grout by hand with a stiff brush to work in the cleaning solution is the most effective way. Once done the floor was rinsed with water and the soiling extracted with a wet vacuum.

The next step was to start burnishing the Marble using a 17-inch set of four diamond encrusted pads of increasing grits. These pads are run over the floor using a weighted buffing machine to increase traction and contact with the stone. The first two pads as 400 and 800-grit and are used with a little water to remove the scratches, etching and generally clean the stone. After each pad the dirty residue was removed with the wet vacuum and the floor rinsed with water. The process was then repeated using a finer 1500 grit pad which started to put the shine back onto the Marble tiles and after being run over each tile several times the floor was rinsed and extracted again.

Sealing a Marble Tiled Entrance Hall Floor

The floor was left to dry out overnight and work resumed the next morning to polish the floor using the last of the four burnishing pads which is a very fine 3500-grit. This last pad is applied dry with just a spray of water to create a high gloss finish.

Next step was to seal the Marble to protect it from ingrained dirt and staining. This was done using Tile Doctor Ultra-Seal which is a clear impregnator that works by soaking into the stone occupying the pores and ensuring dirt remains on the surface.

To give the floor the deeper shine the owner wanted a final product called Tile Doctor Shine Powder was applied. A tablespoon of shine powder is dissolved into a little water to make a paste and this is then worked into the Marble using a white buffing pad.

Scratched Marble Floor After Polishing Alvanley Helsby

After another rinse and extraction with the wet vacuum the last step was to further buff the floor with a white pad to bring up the deep shine. The finish was very impressive and the owner was very pleased with the improvement int the floor. For aftercare I recommended they use Stone Soap as its designed for the regular cleaning of sealed and polished stone, as well as cleaning it also helps build the patina.


Professional Restoration of a Mable Tiled Hallway in West Cheshire

Marble Hallway Floor Polished to a Deep Shine in Alvanley Read More »

Green Limestone Floor Renovation Grappenhall

Green Limestone Kitchen Floor Cleaned and Sealed in Grappenhall

Recently I visited a farmhouse in Grappenhall to look at a kitchen floor that was laid with beautiful Green Limestone tiles. Grappenhall is a lovely Cheshire village which is better known as a period TV and film location.

Green Limestone Floor Before Cleaning Grappenhall

The owner of the property had sent in a request to have the floor cleaned and sealed. This is quite normal for natural stone floors as the protective sealer will wear off with use and once this happens dirt become ingrained in the stone and grout making it difficult to clean.

Whilst at the property I ran a quick test clean with Tile Doctor Pro-Clean which is our go to Tile and Grout cleaner. The Limestone and Grout responded well to the cleaning and later that day I sent over a detailed quote for deep cleaning the whole floor and then sealing.

Green Limestone Floor Before Cleaning Grappenhall

Pleased with the test clean and happy with the quote we were given the go-ahead to clean and seal the whole floor.

Cleaning a Limestone Tiled Kitchen in Grappenhall

On the agreed date work started with clearing the room of furniture and adding protective film to the Kitchen units. Fortunately, the weather was favourable so the furniture was moved outside.

A strong dilution of Pro-Clean was sprayed onto Limestone tile and Grout and then left to soak in for ten minutes. This gives the Pro-Clean time to digest the dirt and breakdown what was left of the original sealer. All the grout lines and edges were then hand scrubbed before moving onto the main floor area. For this a buffing machine fitted with a Black scrubbing pad was run over the tiles with more water applied as required to improve lubrication. This process effectively lifted the ingrained stains and dirt from the tile and grout which was then removed using a wet vacuum.

Once done the floor was inspected and the process repeated were required to ensure the floor was as clean as possible. Finally, the floor was rinsed with more water to remove any traces of cleaning solution and then dried with the wet vacuum.

Sealing a Limestone Tiled Kitchen

The floor was left to dry overnight and the following morning several moisture readings were taken with a damp meter to verify the floor had dried sufficiently for sealing. Once the readings were correct, the floor was sealed using two coats of Tile Doctor Colour Grow, an impregnating colour-enhancing sealer. Floor fans were used to help dry the floor between coats.

Impregnators work by soaking into the pores of the Limestone preventing dirt from residing there and ensuring dirt remains on the surface where it can be easily cleaned away. The colour enhancing formula of the sealer always did a nice job of bringing out the natural green colour in the stone. The floor was then buffed with a white pad to remove any excess sealer and buff up the appearance of the stone.

Green Limestone Floor After Cleaning Sealing Grappenhall

The cleaning and sealing process successfully restored the appearance of the Limestone floor and the Grout looked much whiter and cleaner. We do take pride in our work and I’m please to say the customer was very happy with the result.

Green Limestone Floor After Cleaning Sealing Grappenhall

Before leaving I took time to provide some advice on how to maintain the tiles going forward and the importance of using Tile Doctor Neutral Tile Cleaner for day-to-day cleaning.


Professional Restoration of a Limestone Tiled Kitchen in Cheshire

Green Limestone Kitchen Floor Cleaned and Sealed in Grappenhall Read More »

Green Limestone Kitchen Floor Renovation Pickmere

Stained Green Limestone Kitchen Floor Renovated in Pickmere

We were contacted by a resident of the west Cheshire village of Pickmere about their 90m2 Green Limestone tiled kitchen floor which has been stained by washing up liquid. Although washing up liquid appears to be a harmless the product clearly contains some ingredients that upset the sealer and polish.

Stained Green Limestone before Cleaning Pickmere Stained Green Limestone before Cleaning Pickmere

Unfortunately patching up the floor up wasn’t really an option as the result would be equally patchy. The only option was to re-polish the tiles with a set of Tile Doctor burnishing pads and apply a fresh sealer. I worked out a quote which was agreed and a date set.

Burnishing and Cleaning a Limestone Tiled Floor

Before working on the Limestone, I set about cleaning the grout lines with a strong dilution of Tile Doctor Pro-Clean which is a strong Tile and Grout cleaner. The pads can struggle to reach into the grout lines so I find the best way to clean grout is by hand with stiff brush and extract the soiling with a wet vacuum.

Next step was to start cleaning the stone using the first of the burnishing pads. This first pad is a coarse 400-grit which cuts through and removes old sealers, scratches and dirt from the stone. The pad is attached to a weighted buffer machine and run over each tile using only water for lubrication. The water turns into a dark liquid which was rinsed with more water and removed using the wet vacuum.

This process was repeated with 800-grit pad and the floor was then inspected. Unfortunately, it showed several areas where the staining remained so I spot treated them using Tile Doctor Reduxa. This is a liquid that is sprayed on the stain and then warmed up with a heat gun which literally steams the stain out of the stone. This process has to be repeated several times for the stain to disappear

With the staining gone I finished off burnishing the Limestone with the remaining two pads which are a fine 1500-grit and then the extra fine 3500-grit which is applied using only a little water sprayed onto the stone. This last pad builds up a high-quality polish on the stone and really bring up the finish.

Sealing a Limestone Tiled Floor

The floor was left to dry off fully overnight and I returned the next day to seal the Limestone first checking with a damp meter that the stone was dry. To get the finish the customer wanted a coat of Tile Doctor Colour Grow was applied with is an impregnating colour enhancing sealer. Impregnating sealers works under the surface by occupying the pores in the stone thus preventing dirt from becoming ingrained there. Any excess sealer was wiped off the tile before treating the stone to a gentle buff with a White pad to bring up the shine even further.

Green Limestone After Cleaning Stain Removal Pickmere Green Limestone After Cleaning Stain Removal Pickmere

Once complete the staining was gone and the floor looked amazing much to the relief of the owner. For aftercare I recommended the use of Tile Doctor Stone Soap which is a pH neutral cleaner for the maintenance of polished floor that contains a patina enhancer.

Green Limestone After Cleaning Stain Removal Pickmere


Professional Renovation of a Stained Green Limestone Floor in Cheshire

Stained Green Limestone Kitchen Floor Renovated in Pickmere Read More »

Sandstone Kitchen Floor Renovation Church Minshull

Incredibly Dirty Sandstone Tiled Kitchen Floor Renovation in Church Minshull

We received an enquiry from a client in the sleepy village of Church Minshull, North of Nantwich, in the Cheshire countryside to ask if we could renovate a Sandstone tiled kitchen floor.

Availability was critical in this case as they were having a new kitchen fitted and they wanted someone who could work on the floor in between the old units being removed and the new ones being fitted. Happy to help if I could, I arranged a visit to survey the floor and discuss timings.

Sandstone Kitchen Floor Before Cleaning Church Minshull

Whilst at the property I conducted a test clean on a small section of flooring which revealed just how incredibly dirty the stone had become. It was clear to me that the sandstone was heavily ingrained with dirt and that any sealer that may have been present was now long gone. Sealers prevent dirt from dirt becoming ingrained into the pores of the stone which keeps the dirt on the surface where it’s much easier to remove.

Sandstone Kitchen Floor During Test Cleaning Church Minshull

Impressed with the difference I had been able to achieve so quickly and happy with my quote for renovating the whole floor the only thing outstanding was to work out if I could get the floor clean before the new kitchen was installed. Fortunately, I was able to move a few things around so it would work.

Cleaning a Sandstone Tiled Kitchen

To get the floor clean, work started with an application of Tile Doctor Pro-Clean which is a strong alkaline tile and grout cleaner. I used a very strong solution diluting four parts Tile Doctor Pro-Clean to only one part water. This was then left to soak into the sandstone for twenty minutes to give it time to break down the dirt.

The grout lines were then scrubbed using a stiff grout brush before turning attention to the Sandstone which was scrubbed using a rotary floor machine fitted with a Black scrubbing pad and more water. All this scrubbing released a lot of dirt from the floor turning the cleaning solution into a dark slurry. The dirty residue was then removed by wet vacuum.

The floor was then inspected, and the process repeated where needed. Once I was happy the Sandstone and Grout were clear of all the dirt, I gave it a final rinse and extracted as much moisture as possible with the wet vacuum.

Sealing a Sandstone Tiled Kitchen

The floor was left to dry overnight, and work resumed the next day to seal the floor. First the floor was checked with a damp meter to make sure it was dry and ready to take a seal.
The results were fine and so the floor was sealed with two coats of Tile Doctor Colour Grow which is an impregnating colour enhancing sealer. Large fans were used to speed up the drying process between coats.

Sandstone Kitchen Floor After Cleaning Church Minshull

Once done the floor looked incredibly different, the patterns and colours in the stone were now visible and it looked so much cleaner. The grout had also responded well and the floor was completely transformed by the work.

Sandstone Kitchen Floor After Renovation Church Minshull

For aftercare cleaning I recommended they use of Tile Doctor Neutral Tile Cleaner which is an effective pH neutral tile and grout cleaner that won’t impact the sealer.


Professional Restoration of a Sandstone Tiled Kitchen in West Cheshire

Incredibly Dirty Sandstone Tiled Kitchen Floor Renovation in Church Minshull Read More »

Travertine Kitchen Utility Floor Renovation Neston Wirral

Deep Cleaning a Filthy Travertine Floor Tiles in Neston Utility Room

This Travertine tiles in the Utility room of this property in Neston on the Wirral Peninsula had become filthy with ingrained dirt. Any sealer that was once present on the stone or grout has long since worn off and the grout especially had darkened with ground in dirt.

Travertine Kitchen Utility Floor Before Cleaning Neston Wirral

This is a common problem with stone floors as the sealer ensures dirt remains on the surface where it is easily cleaned away. Sealers however wear down with use and so they do need replacing every three to five years depending on use. This happens gradually over time and tends to go un-noticed until eventually you realise it no longer looks like it should.

To renovate the floor, I quoted for deep cleaning the stone and grout, strip off what was left of the old sealer, polish the stone and then re-seal to ensure easy maintenance in the future. Some of the Travertine tile also had small pitts that were dirt magnets so I offered to fill these in with a specialist stone filler as part of the work.

Happy with the price and relieved to have found someone who could renovate the floor a date was set for they work to start.

Deep Cleaning Travertine Tile and Grout

The best way to restore the appearance of honed stone is the application of diamond encrusted burnishing pads which come is a set of four pads with different grits. Work starts with the coarse 400-grit pad which is fitted to a rotary floor machine and run over each tile several times using only water for lubrication. This coarse pad cuts through the stone to remove dirt, old sealer, marks and fine scratches. The water turns into a dark slurry and this is rinsed off and extracted with a wet vacuum.

Pads can struggle to reach into the recesses of the grout line so the next step was to hand clean the grout using Tile Doctor Pro-Clean, scrubbed in with a stiff brush. Pro-Clean is a strong alkaline tile and grout cleaning product which is safe to use on all types of tile and grout. The soiling was then rinsed and extracted as before with the wet vacuum.

Next step was to fill in the small holes in the Travertine with a specialist stone filler which is colour matched to the stone. Once done its very difficult to detect and will prevent dirt from becoming lodged.

Once the filler had set work continued with the burnishing of the floor using the 800 and 1500-grit pads using the same process as before with water. These pads bring up the appearance of the stone building up a lovely finish. The floor was then left to dry out overnight.

Sealing Travertine Tiles

I returned the next morning and set about applying the last pad which is a very fine 3000-grit polishing pad. This last pad is applied dry with only a little water sprayed onto the Travertine; this is a process we call a “Spray Burnish”.

Last step was to seal the floor with an impregnating sealer that works by occupying the pores in the stone thereby preventing dirt from residing there and ensuring it remains on the surface where its easily cleaned away. The client loved the light appearance of the natural stone so Tile Doctor Ultra-Seal was applied which provides invisible protection and doesn’t darken the stone.

Travertine Kitchen Utility Floor After Renovation Neston Wirral

One the sealer had dried I gave the floor a quick buff with a White Pad and once complete the floor looked so much cleaner and lighter; the grout in particular was transformed by the treatment. For aftercare cleaning I recommended the use of Tile Doctor Stone Soap which will help maintain the patina on the stone.


Professional Cleaning and Polishing of Travertine Ties in the Wirral

Deep Cleaning a Filthy Travertine Floor Tiles in Neston Utility Room Read More »

Ceramic Shower Cubicle Tile Grout Renovation Lower Whitley

Deep Cleaning Shower Ceramic Cubicle Tile and Grout in Lower Whitley

We were recently contacted about cleaning a Ceramic Tiled shower cubicle by a landlord in Lower Whitley which is set in the rural countryside of Cheshire. The area was once part of Lord Daresbury Estate, the Greenall Whitley brewery and only a short drive from my base in Warrington.

The client had been renting out their cottage and following the end of a long lease they discovered the shower cubicle had never been cleaned properly and was now full of mould. The grout lines in particular had attracted a lot of staining and in some places were orange with the dye that occurs in soap and shampoo. It would be difficult to attract a new tenant with the bathroom in this condition, and so I was asked to clean the shower tiles and the grout and make it presentable again.

Ceramic Shower Cubicle Tile Grout Before Cleaning Lower Whitley

Deep Cleaning a Ceramic Tiled Shower Cubicle

I started by spraying the grout lines with Tile Doctor Duo Clean which is a double action grout and mould remover and was designed for situations like this. After leaving it to dwell for ten to twenty minutes the grout lines were scrubbed with hot water and a stiff brush then rinsed off with more water.

There was still some staining left so I coated the wall tiles and grout with Tile Doctor Oxy-Gel and again left it to soak in, being a gel, it stays put for longer so it can get to work breaking down the dirt.

As this was soaking in, I removed all the old silicone around the cubicle, between the tiles and shower glass and shower tray. Once this was done, I gave the stubborn areas a further scrub and rinsed the soiling off with more water. When working on these type of jobs, rinsing is much easier in the shower. In other situations, where immediate drainage is not an option, we use a wet vacuum to extract the soil away.

I forced dried the tiles and grout and then set about replacing the silicone sealant I had stripped out earlier.

Sealing a Ceramic Tiled Shower Cubicle

The last step was to seal the grout by spraying on Tile Doctor Aerosol Tile and Grout Sealer which is very quick to do and ensures water simply runs straight off the tile and grout and doesn’t collect on the surface. The tiles themselves are ceramic so are sealed in production so there is no need to apply any products to them however the grout has a rough surface which can attract dirt and mould so it’s always best to protect it.

Ceramic Shower Cubicle Tile Grout After Cleaning Lower Whitley

The work took about 4 hours and once done the shower was transformed and looked amazing. I was confident they would not have a problem attracting a new tenant now.

My client was delighted with the work we had done and were rather relieved that more work and tile replacement was not needed.

I also suggested that they should invest in some Tile Doctor Aqua Pro Cleaner and recommend it to the incoming tenant, this is a pH neutral product which is designed with everyday use in mind. It will remove the scum build up and any hard water deposits, ensuring the shower does not get back into poor condition.


Professional Restoration of a Ceramic Tiled Shower Cubicle in Cheshire

Deep Cleaning Shower Ceramic Cubicle Tile and Grout in Lower Whitley Read More »

Ceramic Wood Plank Effect Shower Tile Cleaning Kirby Wirral

Limescale Removed from Ceramic Wood Effect Tiles in West Kirby Wet Room

We received an enquiry from a new homeowner in West Kirby keen to discover if anything could be done to renovate a wet room that had been tiled completely in Ceramic wood effect tiles. It had not been used since the previous owners moved out four months earlier and was stained with limescale and the usual build-up of grime and dyes you find from the regular use of soaps and shampoos etc.

I went over to survey the wet room tiles and see for myself the extent of the staining. I’ve never come across a wet room tiled exclusively in wood effect tiles before, it was certainly different and the limescale certainly detracted from its look.

Ceramic Wood Plank Effect Shower Tile Before Cleaning Kirby Wirral

I worked out a solution to resolve the problems agreed a price to do the work and a date was scheduled for the work to take place.

Cleaning a Ceramic Tiled Wet Room

Limescale can be removed using an acidic product such as Tile Doctor Grout Clean-up or Acid Gel, however you must be careful as some natural stone tiles such as Limestone can be etched with the use of acidic cleaning products. Fortunately, these tiles were Ceramic and so this wouldn’t be a problem. For this job I decided to go with Tile Doctor Acid Gel as being in a gel form it is much easier to control and it would stick better to the vertical surfaces.

On arrival I split the shower into sections focusing on the wall tiles first. The method was straight forward, apply the Tile Doctor Acid Gel, allow it to soak in for twenty minutes and then manually scrub into the tile and grout with a stiff brush. Rinse off and then re-treat any stubborn areas that needed further work. With the wall tiles done I moved onto the floor using the same process as the walls but using a wet vacuum to remove the residue on the floor.

Once complete and dried the wet room looked transformed, I got the impression I was in an old wooden ship and began to appreciate why the previous owner had gone for the effect.

My client was very happy with the difference and much relieved I had been able to vanquish all the limescale.

Ceramic Wood Plank Effect Shower Tile After Cleaning Kirby Wirral

I recommended the use of Tile Doctor Aqua Pro for regular day to day cleaning; this has a neutral formula and will eliminate any build-up of shampoos and soaps as well as any hard water deposits which build up over time. It has a nice fresh lemon smell and comes with a trigger spray for easy application. Due to the tiles being ceramic there is no need to apply a seal as the surface is sealed at the factory.


Professional Restoration of a Ceramic Tiled Wet Room in West Cheshire

Limescale Removed from Ceramic Wood Effect Tiles in West Kirby Wet Room Read More »

Terracotta Tiled Kitchen Floor Cleaned Sealed Whightgate Northwich

Terracotta Tiled Kitchen Floor Cleaned and Sealed in Whitegate

We received an enquiry from a previous customer who lives in Whitegate near Northwich asking for a clean and seal of her small terracotta kitchen floor. It seems we did such a great job five years ago she was keen to ask us back to do it again.

Terracotta looks great in a Kitchen but you do need to maintain the sealer otherwise it will eventually wear down with use and let dirt become trapped in its pores, at which it becomes very difficult to keep clean as your standard mop and bucket won’t flush the dirt out of the pores.

Terracotta Tiled Kitchen Floor Before Cleaning Whightgate Northwich

Its also worth mentioning at this point that the life of a sealer can be greatly reduced with the use of strong cleaning products, most tile cleaning products you find in a supermarket are only designed for use on Ceramic or Vinyl flooring and are simply too strong for use on a sealed tile (always read the label!).

Deep Cleaning a Terracotta Tiled Kitchen Floor

After protecting the Kitchen units and skirting boards with plastic sheeting my first job was to strip any remaining sealer off the Terracotta tiles using Tile Doctor Remove and Go in 1 part solution to 4 parts water dilution. The solution was spread across the floor and then left to dwell for ten minutes before scrubbing it in with a black scrubbing pad attached to a rotary floor buffer running at a slow speed.

Terracotta Tiled Kitchen Floor During Cleaning Whightgate Northwich

Removing all the old sealer is an important step as the floor will have experienced different levels of wear across the area and to apply more sealer on top will mean some areas become darker due to the build-up. For the best finish its always best to strip off the old sealer first and get down to the bare tile.

With the sealer removed the next step was to improve the appearance of the grout using more Remove and Go and worked in by hand with a scrubbing brush and a wire brush. Once done the slurry was extracted with a wet vacuum and the process repeated where necessary to make sure the Terracotta and grout was as clean as it could be. After a final rinse and dry with the wet vacuum the floor was left to dry off fully overnight.

Terracotta Tiled Kitchen Floor After Cleaning Whightgate Northwich

Sealing a Terracotta Tiled Kitchen Floor

I returned the next morning and tested the tiles with a damp meter to ensure the tiles were dry before applying the sealer. All was well, so I started with the application of the first coat Tile Doctor Seal and Go which is a water-based sealer that works well on clay tiles and adds a lovely sheen finish to the floor. Due to the porous nature of Terracotta, it actually took eight coats of Seal and Go before it was completely sealed, each coat was applied using a paint pad.

Terracotta Tiled Kitchen Floor After Sealing Whightgate Northwich

The clean and new sealer really lifted the appearance of the kitchen much to the delight of my customer who was once again over the moon with the result. For aftercare cleaning I recommended Tile Doctor Neutral Tile Cleaner which is a mild but effective cleaning product designed for use on sealed tiles.


Professional Cleaning of a Terracotta Tiled Floor in Cheshire

Terracotta Tiled Kitchen Floor Cleaned and Sealed in Whitegate Read More »

Travertine Tiled Kitchen Floor Before After Polishing Delamere

Polishing a Travertine Tiled Kitchen Floor in Delamere

This Travertine Polishing enquiry came from a homeowner in the village of Delamere which is in the middle of the Cheshire countryside, West of Winsford. The customer had recently moved to the area and was unhappy with the dull appearance of their Travertine tiled kitchen floor, there were also small holes in the tiles which needed filling.

Travertine is a natural stone and holes or pitting can appear as thin layers of surface stone break down to reveal a cavity underneath. This is a common problem and can be made worse by the use of strong acidic cleaning products that eat away at the surface over time.

The solution was to fill the holes using a matching epoxy filler, deep clean the grout and then burnish the tiles to remove the dirt and bring up the polish. Happy with my quote we agreed a date for the work to commence.

Travertine Floor Tiles Before Polishing Delamere

Grout Cleaning and Filling Pitts in a Travertine Tiled Kitchen Floor

The first job was to fill the holes/pitts in the Travertine using a purpose made product called Tenax which comes in a variety of colours and is described as an adhesive filler that sets hard.

Travertine Floor Tiles During Filling Delamere

Step two was to get the grout clean so I applied a strong dilution of Tile Doctor Pro-Clean which is an alkaline tile and grout cleaner. I left this to soak in and breakdown the dirt for roughly ten minutes before scrubbing it in by hand. Once done the floor was rinsed with water and the soil now released from the stone extracted using a wet vacuum.

Polishing a Travertine Tiled Kitchen Floor

To bring back the polished appearance of the Travertine I applied a set of four diamond burnishing pads of different grades in sequence from coarse to extra fine. The first two pads take off any remaining sealer and dirt, the floor is then washed down and the residue removed by wet vacuum. We then go onto the third pad which is a 1500 grit which starts to put a shine back on the stone. The floor is then washed down again with clean water and the slurry removed with the wet vacuum.

The floor is then forced dried by large fans and once dry the last pad is applied which is a 3000-grit pad that puts a high shine on the floor. A small amount of water is sprayed onto the tiles during this process which we refer to as a spray burnish.

Sealing a Travertine Tiled Kitchen Floor

Spray burnishing also leaves the floor dry and ready to be sealed. The owner wanted the Travertine to look as natural as possible so two coats of Tile Doctor Ultra Seal were applied. This is an impregnating sealer which is recommended for use on polished stone and for use in kitchens. To finish and to remove excess sealer the floor was then buffed with a White pad.

Travertine Kitchen Floor Tiles After Polishing Delamere

I mentioned at the beginning of this post not to use strong cleaning products on Travertine and this advice is especially relevant if the stone is sealed as strong products including bleach can also erode the sealer. For the regular cleaning of sealed Travertine, I would recommend using Tile Doctor Stone Soap which is a gentle but effective cleaner that also helps maintain the patina.


Professional Renovation of a Dull Travertine Kitchen Floor in Cheshire

Polishing a Travertine Tiled Kitchen Floor in Delamere Read More »

Scroll to Top